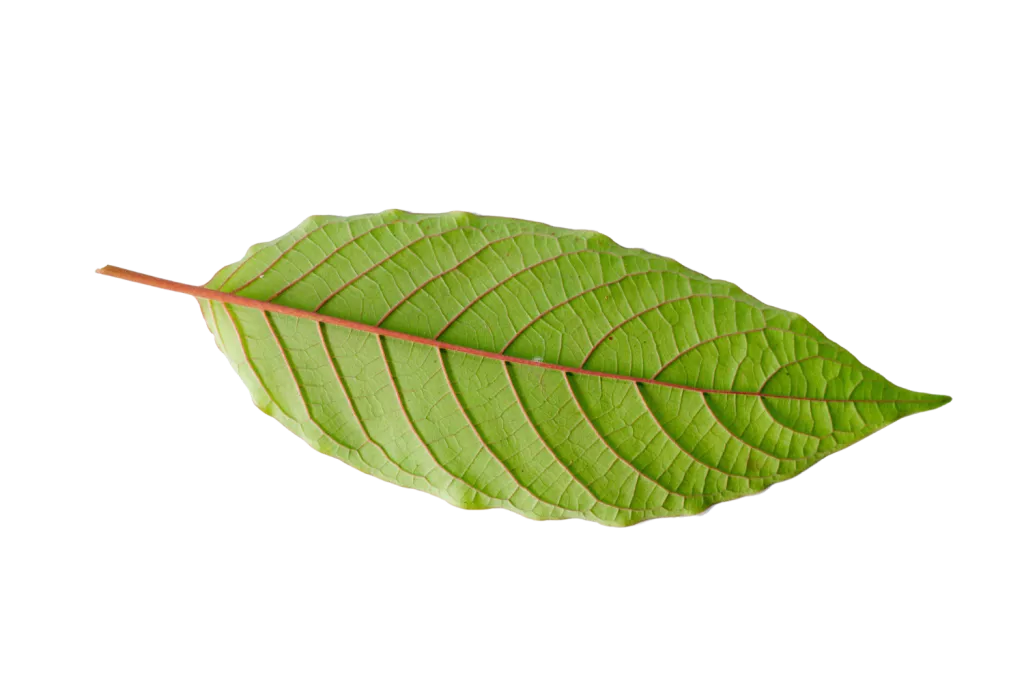
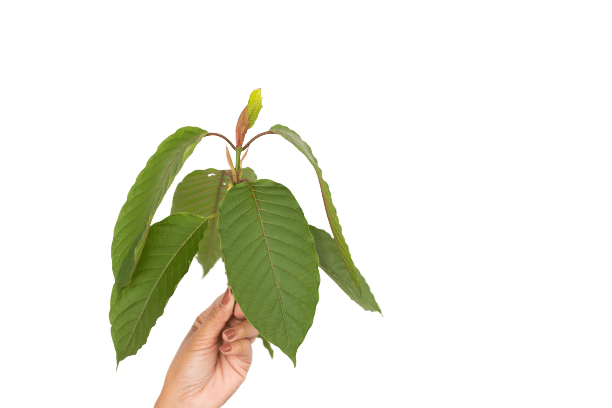
What Is Kratom?
Kratom (Mitragyna speciosa) is a member of the Rubiaceae family of plants, making it a close relative of the coffee plant (Coffea spp.). No wonder we love it.
Much like its cousin, kratom is a powerful central nervous system stimulant and can boost both physical and mental energy.
Kratom has been a popular herb among laborers in Asian countries as a way to prevent burnout since the early 19th century — but its traditional medicinal use extends much further than that. It was also used to treat diarrhea, fever, and wounds and even as a dewormer.
The Western world doesn’t use kratom for those things — yet — but it does have a wide range of uses.
Kratom is unique — it has some qualities that are stimulating and others that are sedative. Its effects depend on the dose. Larger amounts of kratom give powerful painkilling and euphoric effects similar to opiate pain medications.
In lower doses, the kratom plant only offers mild pain relief but activates the central nervous system to make users feel more alert, focused, and energized.
How Is Kratom Used?
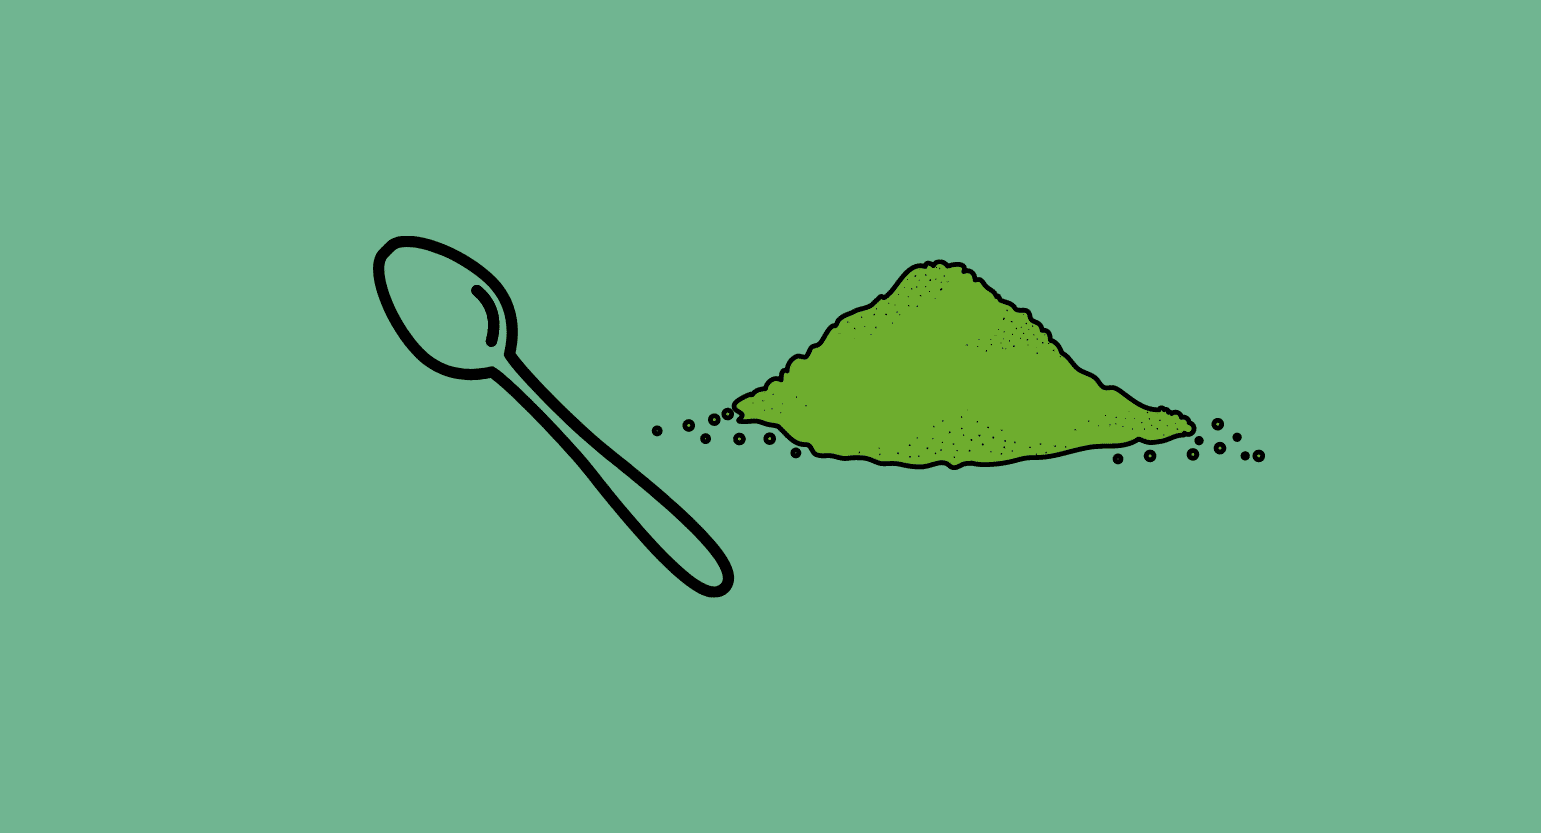
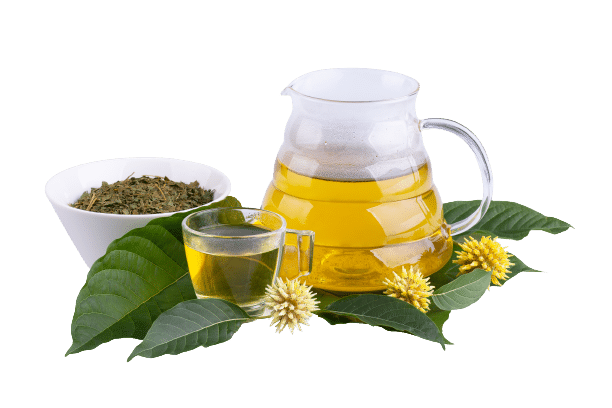
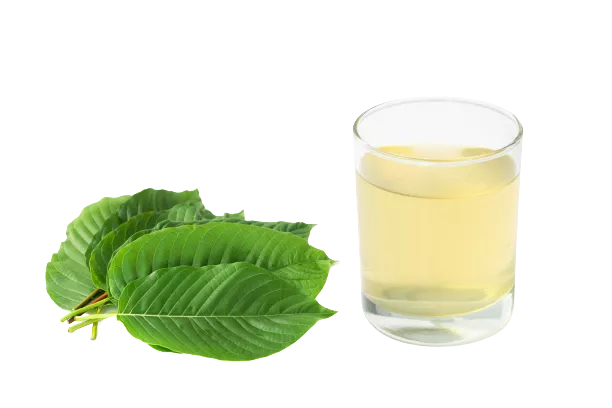
Traditionally, Mitragyna speciosa leaves are chewed fresh. In order to send kratom to the rest of the world, the leaves are usually dried and powdered. Luckily, there are many ways to use powdered kratom, so we’ll cover some of our favorites here.
Kratom doesn’t taste good — it has a bitter, earthy flavor, making it hard for some people to get down. Adding a sweetener or mixing it with juice can help mask the taste.
The most common method, by far, is to brew the powder as tea. Kratom tea has a fast onset and helps you avoid an upset stomach.
The “toss and wash” method is another popular way and involves “tossing” back the dose of powder and swallowing it down with a drink of water or other liquid (the “wash” part).
You can also cook with kratom or parachute it, but if you want something really creative, try the red bubble method.
Many people choose capsules so they can avoid the taste and because they’re portable. The downside is that they’re expensive, and you’ll need to take several capsules to hit the effective dose.
As kratom becomes more popular, manufacturers get more creative. We’re no longer stuck with powder or capsules — there are many different products on the market now.
Kratom extracts are made by removing everything but the active ingredients of the kratom resin. This is then sold as is or made into a variety of other products. You can buy kratom extract powder, shots, tinctures, gummies, and other candies and treats like cookies, honey sticks, etc.
Have fun experimenting with different techniques and see what you like best. If you come up with something new, let us know!

What’s the Dose of Kratom?
Correct dosing is crucial when it comes to kratom, but there’s no one-size-fits-all answer. There are too many variables to consider — including strain selection and freshness, your individual weight, tolerance, and the desired effects.
We can split the dose of kratom into two different camps:
- Low-Dose Kratom (2–6 grams of dried powder)
- High-Dose Kratom (6–12 grams of dried powder)
If it’s your first time using kratom, start at the lowest dosage range and increase gradually over several sessions once you know how your body responds.
If you want a more precise estimate on the ideal dose of kratom for your body — aim to take around 0.03 grams per pound of body weight for the stimulating effects or a dose of 0.06 grams per pound for the sedative and painkilling effects.
For reference, a teaspoon of dried kratom powder is around 2.5 grams of powder, and a tablespoon is roughly 7 grams.
Or, skip the math and let us do the work. We have a calculator for that: Kratom Dosage Guide & Calculator.
What Does Kratom Feel Like?
Kratom is a complex plant — there are about 40 alkaloids in the leaves, each with its own set of effects. The ratios of these compounds change from one strain to another, giving each one a unique effect profile.
The dose also affects how kratom feels.
Low doses are stimulating. It feels similar to coffee but is less likely to result in negative side effects like anxiety or jitteriness. It also has a mild euphoric action at this dose — helping to uplift your mood and promote more clarity of thought. These doses are used as a nootropic or stimulant to boost physical and mental energy and stamina.
With higher doses, the effects do a complete flip. Kratom will have a sedative action and make you feel relaxed, carefree, and tired. These doses are most useful for supporting sleep, easing anxiety, and alleviating chronic pain or muscle tension.
It’s also a popular aphrodisiac — increasing sexual arousal and improving erectile function. Some people find kratom’s sexual effects begin to taper off with higher doses.
How Long Does Kratom Last?
In total, kratom’s effects last around 3 or 4 hours.
It takes about 30 minutes to take effect and peaks around the 1-hour mark. People who use kratom on an empty stomach report an even faster onset of effects — but this also increases the chances of experiencing side effects.
What Are the Benefits of Kratom?
Kratom has a long history of medical uses that range from infection and bladder disease, fevers, diarrhea, diabetes, fatigue, and mental health disorders.
Today, kratom is primarily used for its nootropic and painkilling benefits. Some users take the herb as an alternative to prescription painkillers or as a buffer to help wean themselves off addictive opiate medications.
There’s limited research on kratom, but there’s enough to show it has great potential. Here’s what we know so far.
Related: Kratom Research Explained
Kratom for Pain
Although there are few studies to back up the potential medical uses of kratom, it’s considered one of the most effective herbal pain relievers — second only to opium.
Kratom is an atypical opioid — it has agonistic actions on the opioid receptors but acts on other systems as well. Its two main alkaloids, mitragynine and 7-hydroxymitragynine, do most of the work, though the latter is more potent as an analgesic.
One common fear is that kratom is dangerous since it’s similar to opioids. However, it is generally safe when used responsibly and has a very low risk of overdose. The biggest dangers are addiction — though this is far less severe than opioid addiction — and drug interactions, both of which are avoidable.
Red strains and larger doses work best, but read our guide on how to use kratom for pain relief for more information.
Kratom for Addiction & Withdrawal
Anecdotal reports and ongoing research suggests kratom could help with the opioid epidemic.
A 2008 case study explored the use of kratom for alleviating withdrawal symptoms of a recovering opiate addict [3]. The patient in this study reported that the withdrawal period was considerably less intense compared to prescription painkillers but took a little longer to recover completely.
Prior to the study, the patient was addicted to hydromorphone. He quit the medication abruptly and was able to avoid withdrawal by using kratom four times per day. He reported kratom was effective for both preventing withdrawal symptoms and alleviating the chronic pain that prompted him to use the painkillers in the first place.
Kratom is currently being explored as an alternative to methadone as the standard treatment for opiate addiction in developing countries due to its impressive safety profile and widespread availability.
Kratom has also been found effective in battling mild symptoms of alcohol withdrawal, such as restlessness, anxiety, aches, pains, and dips in mood.
Kratom As a Nootropic
Besides strictly therapeutic qualities, kratom is also considered by brain hackers an effective tool for personal growth. It’s used short-term to boost mental energy and focus, and long-term to enhance overall mental endurance and stamina.
Similar to other natural psychoactive substances, kratom can also catalyze deep emotional, psychological, and interpersonal healing. It’s reported to liberate users from the constraints of everyday patterns in behavior. Some suggest the herb can divert attention to neglected problems by promoting introspective thoughts — especially at higher doses.
Kratom for Anxiety & Depression
Kratom has been shown to have clear antidepressant and anti-anxiety benefits in animal studies [4]. Mice treated with mitragynine were found to have lower concentrations of corticosterone (one of the key stress hormones) in their blood.
Kratom acts on dopamine, adrenergic, and serotonin receptors, making it a powerful tool for improving mood and motivation. It can be calming and help you feel good overall. Note that white strains can also cause anxiety.
Risks & Side Effects of Kratom
Kratom is generally considered safe — but there are some caveats. We need more long-term clinical studies before we can jump to any definitive conclusions.
So far, we know that mitragynine — one of the active ingredients in kratom — demonstrates very little toxicity, even in large doses. Researchers have reported no lethal effects in rats administered very high doses (1000 mg/kg) of kratom leaf or 806 mg/kg of pure mitragynine (taken orally) [5].
With that said, there are still plenty of risks and side effects of using kratom.
Here are the most common side effects, though these are less likely with smaller doses:
- Anxiety
- Constipation
- Dizziness
- Headaches
- Heart palpitations
- Hyperpigmentation
- Insomnia
- Itchiness in the skin
- Loss of muscle coordination
- Low blood pressure
- Low libido
- Nausea
- Poor appetite
- Seizures
- Tremors or muscle contractions
Kratom Adulterants
Kratom adulteration is becoming less of an issue as users become more aware of the dangers and vendors have stepped up their safety protocols.
However, kratom products still vary in quality — different preparations may contain dangerous adulterants. Some samples of kratom have been found to contain prescription painkillers like fentanyl, hydrocodone, or morphine.
In Sweden, nine people died from a “boosted kratom formula” called Krypton. This product contained a combination of kratom, caffeine, and O-desmethyltramadol. Other kratom products have been found to contain significantly less kratom than advertised on their packaging.
Check out our section below on how to find a trustworthy vendor.
Kratom & Drug Interactions
Kratom should not be mixed with any other medications. There have been reports of patients mixing kratom with stimulant medications, such as modafinil, which have led to seizures.
It’s also particularly dangerous to mix kratom with alcohol or other central nervous system depressants — especially with higher doses.
If you’re taking any illicit or prescription medications, it’s important you first speak with your doctor about using kratom.
Can You Overdose on Kratom?
You’re unlikely to overdose on kratom.
Although no study has identified a lethal kratom dosage in humans, one 2019 study found the lethal dose in mice.
It was actually a lethal dose of extracted alkaloids injected intravenously. For mitragynine, a median lethal dose for 50% of the test population (LD50) was reported to be 27.8 mg per 1 kg of body weight. 7-hydroxymitragynine has a threshold of 24.7 mg/kg [8].
When consumed orally, the LD50 for mitragynine in mice was 547.7 mg/kg, with no lethal dosage observed for 7-hydroxymitragynine.
These doses are far too high to reasonably achieve using oral forms of the herb. Only by injection is it possible to hit doses this high. Kratom produces severe nausea and vomiting long before reaching the toxic dose.
Related: How Much Kratom Is Too Much?
Is Kratom Addictive?
Yes, kratom can be addictive — but only with long-term use.
While the addictive nature of kratom is much milder than powerful pharmaceutical drugs, this herb can still result in changes to the opioid receptors that can lead to physical dependence. The longer you use kratom, and the higher the dose, the more likely you are to become dependent.
Related: Why Is Kratom So Controversial?
Long-Term Negative Health Effects of Kratom
The long-term safety of kratom has yet to be fully elucidated as well. Most of the long-term safety data we have available on the herb come from anecdotal reports only [6].
Users who were taking kratom regularly for two to eight weeks reported experiencing nausea, itching, dark urine, jaundice, and abdominal pain. These side effects may indicate that long-term usealso affects the liver. Heavy kratom users might have problems with over-pigmentation or darkening of the cheeks. In rare cases, high concentrations of alkaloids may cause kidney damage and compromise cardiovascular functions [7].
Related: An In-Depth Look At Kratom’s Long-Term Side Effects
Kratom Active Constituents
There are literally dozens of active ingredients in the kratom plant, each one producing a different set of effects. Most of the active ingredients are classified as either indole or oxindole alkaloids. They exert their painkilling, anxiolytic, stimulating, and nootropic benefits by binding and interacting with various neurotransmitters in the brain.
Each kratom strain has a different ratio of active ingredients — this gives each plant a unique set of effects. Some are more stimulating, others more sedative or painkiller. The difference in effects is the result of different concentrations of the active ingredients.
Roughly 90% of the active alkaloid content consists of just four compounds, but there are many others as well:
- Mitragynine — This is the most abundant constituent in most kratom strains, accounting for up to 66% of the total alkaloid content of the plant. It acts as a 5-HT2A receptor agonist, which is a similar mechanism of action used by psychedelics like LSD and psilocybin. It also targets the mu-opioid and kappa-opioid receptors.
- Paynantheine — The second most abundant alkaloid in kratom. Paynantheine acts as a smooth muscle-relaxant and opioid receptor agonist with relaxing effects.
- Speciogynine — The third most abundant alkaloid in kratom. It provides a great deal of the plant’s muscle-relaxant and anti-anxiety benefits.
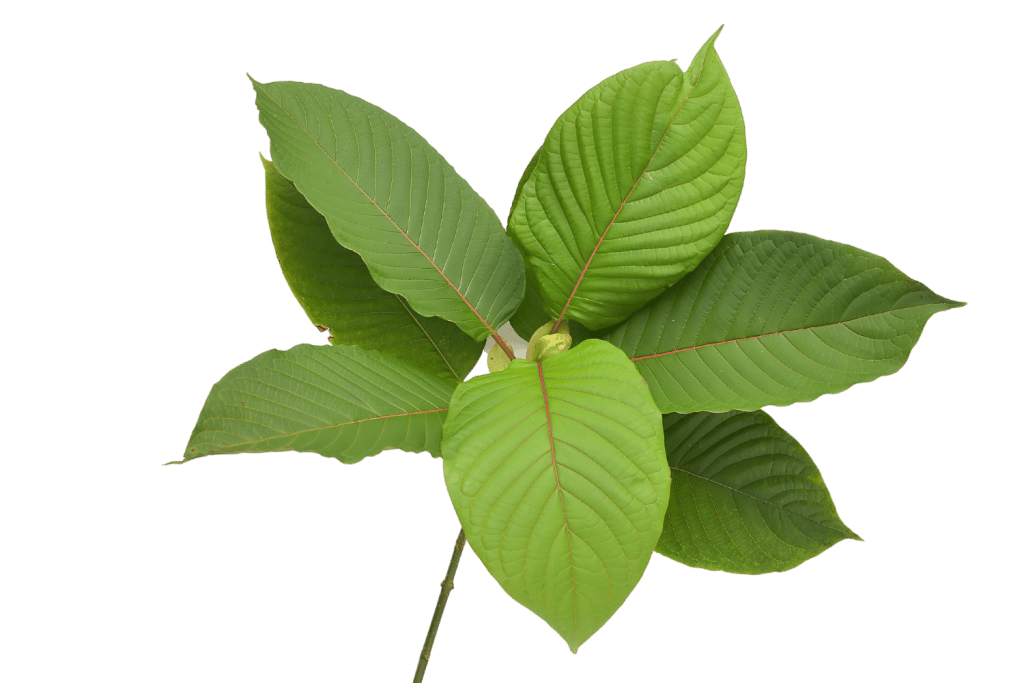
- 7-hydroxymitragynine — Abundant in varying concentrations for different kratom strains but is most common in red-veined kratom strains. Acts through the mu-opioid receptors.
What Are the Different Types of Kratom?
As with most plants, there are many different strains of kratom — each with different characteristics.
What Is a Strain?
Whereas a species is a genetically unique plant with its own species name, a strain refers to the offspring of a plant that shares the same genetic makeup but differences in physical or chemical profiles. All kratom is the same species (Mitragyna speciosa), but there are many different strains within that species — such as Red Kali, Green Hulu, White Dragon, and many more.
There are three main categories for the different kratom strains based on the color of the leaf veins — red, white, and green.
While there’s a lot of variability within each category, it is a fairly reliable way of cataloging the different effects we can expect from each leaf type.
Red Vein Kratom Strains
Red vein kratom is generally more relaxing and sedating than the other types. It’s usually the best option for pain relief and sleep support. The red color is thought to result from the higher 7-hydroxymitragynine concentrations.
These strains are also some of the most fast-acting. You can start to feel the effects of most red-veined leaves within about 20 minutes.
Red-Vein Kratom Strains Include:
White Vein Kratom Strains
White vein kratom is generally thought to be the most stimulating option (with some exceptions).
It’s more popular among people who tend to take their kratom first thing in the morning, similar to coffee. They’re rich in euphoric alkaloids, which make them a great option for boosting mood and motivation.
White-Vein Kratom Strains Include:
Green Vein Kratom Strains
Green-vein kratom is usually quite balanced, offering a good array of sleep-supportive, anti-anxiety, and stimulating benefits.
Because of the high variability within the green-veined group, these strains are much more unpredictable. Some are more stimulating, others much more sedative.
Green-Vein Kratom Strains Include:
Is Kratom Legal?
Yes, kratom is legal in most (but not all) parts of the world.
Kratom, like many other mind-altering plants, has a checkered history with the legal system. Unfortunately, there’s a lot of misinformation floating around, giving kratom a bad name.
There seem to be three different philosophies a country can take toward the kratom plant:
- “It can be addictive, so it should be illegal!”
- “It’s much less addictive and dangerous than other opiates, so it should be legal!”
- “What the heck is kratom?”
Kratom Laws In North America
Kratom isn’t included in the United States federal list of controlled substances, although the DEA considers it a “drug of concern.” This means it’s on their watch list but not officially banned or regulated. If it becomes clear the herb is leading to issues with overdoses or addiction, they’ll likely step in to ban it nationwide.
However, as we’ve already covered, the potential for abuse with kratom is much lower than all other opioid medications, and it’s virtually impossible to overdose on when used responsibly.
The World Health Organization (WHO) agrees on kratom’s safety — it reviewed the plant in 2021 and stated it is not a threat to public safety but will continue to monitor it.
Most US states, like the federal government, don’t have guidelines involving kratom — which means it’s perfectly legal to buy and use. Others implement the Kratom Consumer Protection Act (KCPA) or a similar version that regulates kratom at a state level. This usually makes it illegal to buy kratom under a certain age and requires retailers and manufacturers to follow certain protocols.
A few states, cities, and counties have decided to ban the herb with local laws.
States that have banned kratom use:
In both Canada and Mexico, the herb is legal — you can order it online or in-store without a prescription.
However, kratom is not supposed to be sold for human consumption in Canada, so you’ll often see it marked as for use in soaps or candles. This makes it a little trickier to find good sources of kratom, so be sure to do your research or check out our guide on Canadian vendors.
Kratom Laws In Asia & Australia
In Malaysia and Thailand, kratom is also known as biak-biak, kakuam, ithang, thom/tom, and ketum. It’s so deeply rooted in the local culture that hardly anybody considers it a drug. Most people will turn to kratom for pain relief before going for prescription painkillers.
Indonesia still allows the use of kratom. In fact, they’re the primary exporter in all of Southeast Asia. However, they plan to ban it in 2024. This would have global implications as it would deeply impact the kratom supply, so we’ll keep you updated as this unfolds.
Other Southeast Asian countries have banned the substance — including Malaysia and Thailand — until Thailand reversed its ban in 2021.
Australia, Japan, Myanmar, New Zealand, Singapore, and South Korea have also banned or regulated the use of kratom.
Kratom Laws In Europe
Neither Mitragyna speciosa nor mitragynine or other alkaloids from the plant are listed in any of the Schedules of the United Nations Drug Conventions.
Different European countries have a big difference in opinion on the kratom plant. Some parts permit the sale openly; others have no mention of the herb — good or bad — while others ban it with enforced jail sentences.
The European Kratom Alliance (EKA) — similar to the AKA — advocates for kratom legalization and regulation throughout Europe and promotes safe kratom use. Contact them if you’d like to be proactive in making positive changes.
As of 2023, kratom is legal in the following European countries:
In the UK, kratom remains illegal under the Psychoactive Substances Act. The plant and its active compounds are controlled by various bills in several EU member states, including Denmark, Poland, and Sweden.

Kratom Frequently Asked Questions
There’s a lot involved with this useful herb. If we cannot answer your question, check out this FAQ, which we keep updated whenever we get a new question we haven’t answered. Feel free to drop us a line if there’s something in here we haven’t covered. We’d love to help!
Does Rotating Strains Prevent Tolerance?
Kratom tolerance is one of the main concerns among people who use the plant regularly.
One common misconception is that by using different strains, we can side-skirt the formation of tolerance to this plant.
Unfortunately, aside from a few anecdotal reports on Reddit, there’s no evidence to suggest this is true. The alkaloids are the same in each strain — the only difference is their ratio compared to each other.
The best way to prevent tolerance is to take a break from kratom. Avoid using it for a few days each week and one week each month.
Is Kratom Injectable?
According to a 2018 survey conducted by the Ohio Substance Abuse Monitoring Network, 7 out of 10 kratom users admit they would shoot the drug if they had the opportunity.
It’s technically possible to inject kratom, which is a common method of administering the herb to mice in medical research — however, it’s not practical in real-life applications.
Injecting the herb involves pharmaceutical-grade preparation, which makes it very expensive and hard to find. Secondly, it’s not an enjoyable way of using the plant at all.
The effects of injecting pure kratom alkaloids are rarely positive — often leading to severe side effects and discomfort, such as the kratom wobble.
The bottom line is that while it’s technically possible, nobody injects kratom because it’s expensive, won’t offer you the core benefits, and will make you feel terrible.
Does Kratom Show Up On a Drug-Test
A drug test can only find what it’s looking for. This means if a compound isn’t specifically listed on the drug panel, it’s not going to pick it up.
If kratom is listed on the drug test, it will find it in the bloodstream. It can take over a week for kratom to clear out of the body completely, so if the test is given within that time frame, it will likely show up.
However, most companies, government agencies, or athletic associations ordering the drug test aren’t looking for kratom. The herb is completely legal in most parts of the world, so there’s no reason to look for it in the first place.
This could change if you live in a region where kratom is outlawed.
Kratom is unlikely to trigger a false positive drug test for other opiate medications as well because the chemical structure of the active ingredients is very different from conventional pharmaceutical or illicit opiates.

How Long Does Kratom Stay In Your System?
There are conflicting results regarding the time kratom can be detected in urine [9]. Some say the body flushes kratom out of the body in as little as one day — while others claim it can stay in your system for upwards of two weeks.
Most experts agree kratom alkaloids are virtually undetectable in the blood by the second week after ceasing use.
As with just about any substance, the more often you use it, the longer it takes for it to be removed from the body.
Can Kratom Lead to Psychological Trauma?
There’s some evidence suggesting a link between long-term kratom use and delusional behavior. While moderate use won’t cause psychological problems, some kratom users have developed anxiety after taking high doses for prolonged periods. The kratom “high” is usually mild and easy compared to many other psychoactive substances.
You should never use kratom or any other psychoactive substance if you or a close family member has a history of psychosis, bipolar disorder, or schizophrenia.
Where Can I Buy Kratom?
Kratom is available both locally and online. When searching for kratom near you, make sure to check out local vape shops, head shops, and specialty stores. As mostly a buyer’s market, it offers a full range of options and a myriad of reviews. However, there’s also a lot of confusion and inconsistency.
If you want to get the best deals on high-quality kratom, we recommend finding a trustworthy online vendor. We’re not saying that everyone selling kratom actually knows their business, but you can find many passionate vendors with knowledgeable customer service and premium-grade kratom powder.
Is It Legal to Grow Kratom At Home?
It’s legal to grow kratom wherever the herb isn’t banned.
The only things you need to get started growing kratom are some seeds or live plants — which you can order from most kratom vendors online along with the powder.
Kratom is a tropical plant, so you’ll need to give it lots of light and water and keep it in a nice warm spot in your house, away from the air conditioner, cool windows, or areas of the house that get plenty of breeze.
What’s the Best Way to Take Kratom?
The flavor of this herb is disagreeable, to say the least. Even mixing it with juice does a poor job of masking the flavor. Citrus juice, like lemon or grapefruit, works best to cover the flavor and can act as a potentiator, increasing kratom’s effects. It’s best to just knock it back quickly and get it over with — sort of like ripping off a bandaid.
Ultimately, the best way to take kratom is the way that works best for you and your circumstances. Some people prefer the toss-and-wash, while others would gag and need capsules. Try a few of the methods we mentioned above and see what you like.
Is it Safe to Take Kratom Resins, Extracts, & Tinctures?
Kratom extracts and resins are very potent. They’re safe to use but should only be attempted by those with a lot of experience using kratom. It’s easy to take too much of these concentrated extracts, which can make you feel nauseous and dizzy.
They can also lead to tolerance and addiction quickly, so they are not for everyday use.
Be safe — start with a very low dose and increase gradually until you find what works for you.
Tinctures can be very hit or miss. Some are super potent, others much weaker. With practice, you’ll learn how to gauge the tincture’s potency based on the concentration listed on the bottle (such as 1:5, 2:1, or 10:1).
Related: How to Make Kratom Tinctures
Can I Smoke Kratom?
Although stories of people smoking kratom aren’t unheard of, doing so won’t produce much of an effect, and it’s hard on your lungs. The high heat destroys most of the alkaloids in kratom. You’ll still feel the effects, but they’ll be much milder, and you’ll end up wasting a lot of the active ingredients.
Can I Microdose Kratom?
Some people have posted results of their experiences microdosing kratom. Users report having higher energy levels, better focus, and a stronger sense of health and well-being after using microdoses of kratom.
Currently, there are no clinical studies to back up these effects, and the long-term health implications of taking kratom on a daily basis still aren’t well understoo
Can Kratom Replace Any Medications?
People will use kratom to replace medications, such as pain, anxiety, and stimulants like Adderall or even caffeine. The problem is that kratom interacts dangerously with some of these substances. It’s not safe to combine or replace your medication with kratom unless you talk to your doctor first.
Combining kratom with certain substances could potentially be dangerous. For example, when you mix kratom with opiates, you may suffer from fatal respiratory depression. Loss of consciousness and vomiting are also common side effects of such interactions.
Kratom interacts with oxycodone, hydrocodone, tramadol, DXM, and benzodiazepines, such as Valium, Xanax, and Klonopin.
Kratom and alcohol are not a good pairing due to alcohol’s depressant effects. It could result in respiratory failure due to cross-interaction. Some people use kratom instead of alcohol as a mild intoxicant — but never mix the two together.
Kratom can also be used as an alternative to cannabis. The effects feel different, but the use cases are very similar between these two plants. If you find you react poorly to marijuana and you experience paranoia, anxiety, and insomnia — kratom may be worth a shot. Never mix kratom and marijuana together.
Summary: What Is Kratom & What Is It Used for?
Kratom is an incredibly useful plant. It’s one of the best herbal painkillers in the world and offers a unique dichotomy of stimulating and sedating effects depending on the dose. You can use kratom as a nootropic and stimulant like caffeine or as a sedative and anxiolytic-like cannabis or kava.
Despite its health benefits, kratom is fairly controversial. It’s banned in several countries and listed as a “drug of concern” by the DEA. The worry is that because kratom works on the opioid receptors, it could be addictive.
It’s true that consistent kratom use can develop tolerance and lead to addiction — which is why it’s safest to take regular breaks from kratom every couple of weeks at least. However, compared to most opiate painkillers or sedatives, kratom is significantly safer. It’s much easier to prevent and reverse addictive tendencies to this herb than any other opiate medication.
- Jansen, K. L., & Prast, C. J. (1988). Ethnopharmacology of kratom and the Mitragyna alkaloids. Journal of Ethnopharmacology, 23(1), 115-119.
- Prozialeck, W. C., Jivan, J. K., & Andurkar, S. V. (2012). Pharmacology of kratom: an emerging botanical agent with stimulant, analgesic, and opioid-like effects. The Journal of the American Osteopathic Association, 112(12), 792-799.
- Boyer, E. W., Babu, K. M., Adkins, J. E., McCurdy, C. R., & Halpern, J. H. (2008). Self‐treatment of opioid withdrawal using kratom (Mitragynia speciosa korth). Addiction, 103(6), 1048-1050.
- Idayu, N. F., Hidayat, M. T., Moklas, M. A. M., Sharida, F., Raudzah, A. N., Shamima, A. R., & Apryani, E. (2011). Antidepressant-like effect of mitragynine isolated from Mitragyna speciosa Korth in mice model of depression. Phytomedicine, 18(5), 402-407.
- Ujváry, I. (2014). Psychoactive natural products: an overview of recent developments. Annali dell’Istituto superiore di Sanita, 50, 12-27.
- Swogger, M. T., Hart, E., Erowid, F., Erowid, E., Trabold, N., Yee, K., … & Walsh, Z. (2015). Experiences of kratom users: a qualitative analysis. Journal of psychoactive Drugs, 47(5), 360-367.
- Lu, J., Wei, H., Wu, J., Jamil, M. F. A., Tan, M. L., Adenan, M. I., … & Shim, W. (2014). Evaluation of the cardiotoxicity of mitragynine and its analogs using human induced pluripotent stem cell-derived cardiomyocytes. PLoS One, 9(12), e115648.
- Smith, L. C., Lin, L., Hwang, C. S., Zhou, B., Kubitz, D. M., W